Allowing users to upload profile statuses adds a personal touch to your WordPress site. It lets users share updates, thoughts, and experiences directly on their profiles. This feature creates a sense of community and encourages interaction among members. Profile statuses also make profiles more dynamic, giving your site a social media feel. With ProfileGrid, you can easily enable this feature to keep your users engaged and connected. Let’s explore how adding profile statuses can benefit your community
User Profile Status Extension
To add profile statuses to your WordPress site, you’ll need the ProfileGrid User Profile Statuses extension. This extension adds a status tab to users’ profiles, allowing users to upload updates similar to those on Instagram, Facebook, or WhatsApp.
With this extension, you can easily expand your site’s functionality. It gives users a simple way to share text updates and photos on their profiles. You can even customize the buttons to say ‘Add Profile Status’ or anything else you like.
When users upload a status or image, it becomes visible on their profile for others to see, making your site more interactive and engaging.

Features
User Profile Status extension has some outstanding features. Here are a few of the highlights:
- Allow users to view and share profile statuses from their respective profiles.
- Set a duration for the statuses, which would be calculated with respect to the time when it is being uploaded.
- Add the appearance time of status to specify for how much time status would appear on the profile.
- Set the appearance time to Zero to activate auto-changing of profile statuses.
- Users can upload more than one status at any time.
- Also, the users have the option to upload images with their status including a caption.
- Users can also change the color of the background before uploading their text-based statuses.
- The number of views related to specific status is visible on the profile.
- From these views, users can check which other users have viewed their profiles.
Setting Up The Extension
Install the extension on your WordPress Dashboard and follow the below-given steps to utilize it.
Step 1: Go to the ProfileGrid menu on your left menu bar and click on ‘Extensions.’

Step 2: Scroll down and find User Profile Status. Click on ‘Options’ and open the Profile Status Setting.

Step 3: Change the settings and adjust the features of the extension according to your requirements.

Change Settings
Step 1: Turn on the Profile Status feature. This will activate profile statuses on all user profiles.

Step 2: Choose the duration for the profile status. This sets how long the status will be visible, starting from when it is uploaded.

Step 3: Select the duration till when the status would be active or visible. You can set it in seconds, hours, days, or minutes. Generally, statuses are visible for 24 hours and that’s what we have set in the given example.

Step 4: Set the number of seconds each status will be displayed before moving to the next one. For example, if you enter 20, each status will show for 20 seconds before switching to the next.

Step 5: If you set this value to 0, it will disable the automatic switching of profile statuses.
Step 6: Save the settings. This would display a Profile Status option on the profiles of your users.

You can change the settings and preferences of this extension anytime you want. Simply follow the above steps to change the settings again.
How users can add status to their profile?
Step 1: Users must go to their profile page to add a status.

Step 2: Users should hover their cursor over their profile picture, where they will see an option to add a status.
Step 3: After clicking on ‘Add Status,’ users will see different options to create a status.
Step 4: Users can choose a media file from their system to add images to their status. Further, they can write a caption for their image in the text box.

Step 5: After adding the photo and caption, they can click ‘Update’ to publish the status.
Step 6: Similarly, to add Text status, users can click on Add Text.

Step 7: Users can select a background color and add text. When finished, they can click ‘Update’ to publish the status.

Step 8: After the statuses are published, users will see a ‘View Status’ option below their profile picture.

Step 9: Users can delete the profile status from here.

How to view the profile status of another user?
Step 1: To view the profile status of another user, open the user profile of another user.

Step 2: A blue circle will appear on the profile picture, indicating that the user has uploaded a status.
Step3: When you hover your cursor over the profile picture, you will get an option to view status.
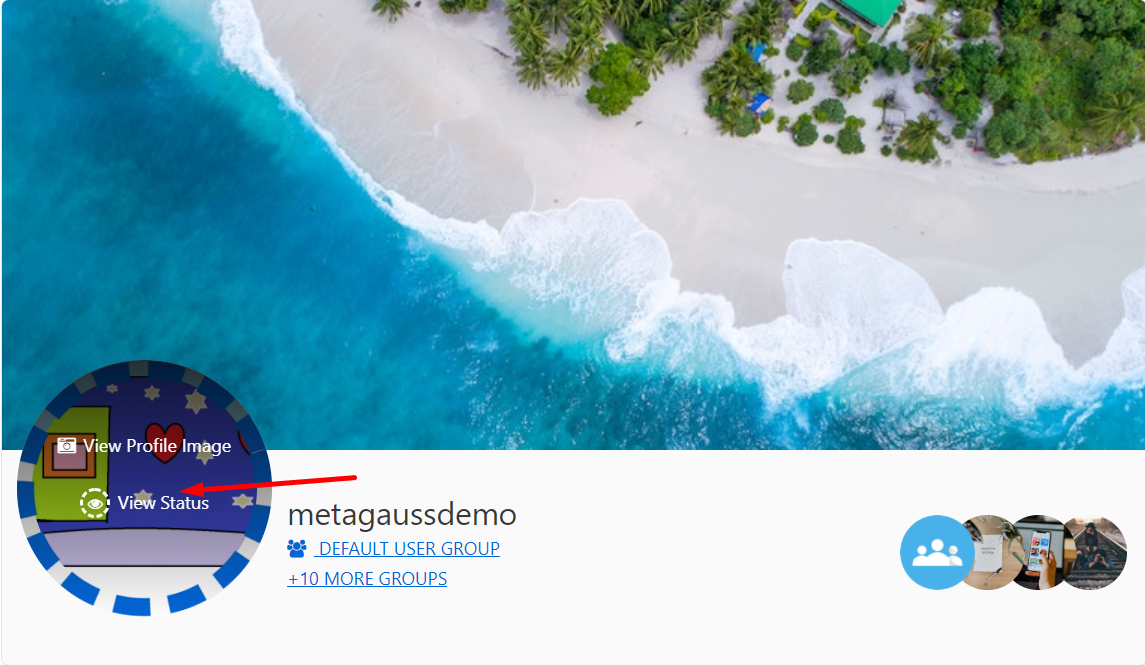
Frontend examples of user profile statuses
Example 1: Here’s an example of two text statuses with different background colors.


Example 2: Here’s an example of a media status.

Summary
Adding a profile status feature to your community website is a great way to keep users engaged and connected. The User Profile Status extension for ProfileGrid makes it easy for users to upload and share their statuses, just like on popular social media platforms. With options to add text, photos, and customize background colors, this feature helps users express themselves and interact with others more personally. If your site hosts an active community, this extension is a must-have to enhance user experience. Check out other features you can add to your site, and if you need help with installation or settings, feel free to leave a comment. We’re here to help!
Hello, it would be great here if you could see the status more prominently. Maybe also in the group: That you have an overview of the respective status of all group members.
Otherwise you don’t notice the status
Hi Peter,
Thank you for your valuable feedback! Making statuses more visible and integrating them into group views is a fantastic idea. It would definitely enhance user interaction and make it easier for group members to stay updated with each other’s activities.
We’ll consider this for future updates to make sure profile statuses are more prominent and accessible across the platform. Stay tuned for more enhancements, and feel free to share any other suggestions you have!